Release 8.0.5
A66251-01
 Library |
 Product |
 Contents |
 Index |
| Oracle8 Installation Guide for LINUX Release 8.0.5 A66251-01 |
|


이 부록은 처음 설치때를 제외하고 Installer를 어떻게 사용하는 가에 대한 설명을 하고 있다. 처음 설치시 사용하는 방법은 Chapter 3, "Installation Tasks"에 기술되어 있다.
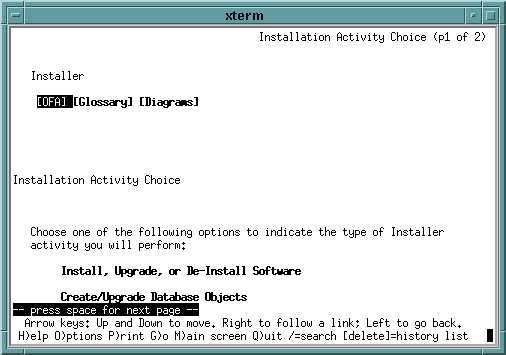
Installer session 은 로컬 시스템과 여러분들이 생성하고자 하는 오라클의 설정에 관한 일련의 질문을 한다. 각각의 질문은 Installer Activity Choice screen과 같은 window 내에 보여주며, 이들은 Figure A-1에서 보는 것 처럼 문자모드와 Motif 모드 둘다 가능하다.
다음 block로 옮기기 위하여 [Tab] key를 이용하라.
Fields 사이를 옮겨 다니기 위해서는 화살표키를 이용하라.
현재 field를 선택하기 위해서는 spacebar를 이용하라.
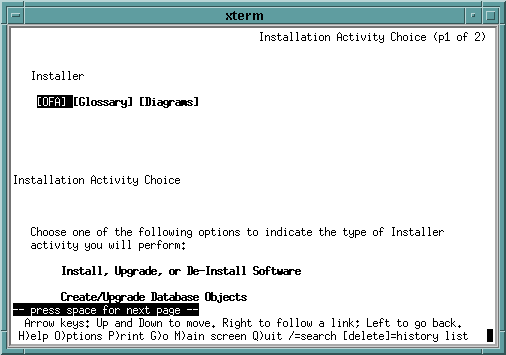
Installer online 도움말을 Motif 또는 문자 모드에 있는 Help button을 눌러서 볼수 있다. Help button을 선택하면 Installer는 browser를 기동한 후 (배포본에 포함되어 있는) 도움말을 보여준다.
Installer는 오라클 제품을 위한 데이타베이스 객체를 생성하기도 한다. 데이타베이스 객체는 tables, tablespaces, roles, views 그리고 indexes와 같은 데이타베이스 내에 저장되는 논리적 구조들이다. Oracle8 Server의 경우 데이타베이스 객체는 데이타베이스와 데아타 디렉토리이다.
Oracle 회사는 데이타베이스 객체를 각각 분리된 Installer session 동안에 생성하고 소프트웨어를 설치할 것을 권장한다. 이것은 Installer가 같은 session동안에 두가지를 하는 것보다 복잡해 보이지만, 여러분들이 설치하는 동안 문제점에 직면할 경우 deguggin하기가 편하다.
어떤 제품은 필요한 데이타베이스 객체를 수동으로 생성해 주어야 하는 경우도 있다. 그러나 오라클 회사는 언제나 Installer를 이용할 것을 권장한다. Installer를 이용하는 것이 객체를 생성하는데 좀더 적절하며 대중적인 자료를 생성할 수 있다고 한다.
|
Note: 이것은 데이타베이스를 생성하는데는 적용시키지 마라 (오라클 RDBMS를 위한 데이타베이스 객체). 데이타베이스를 생성하는 것에 관한 것은 page A-6에 있는 Installer-Created Database를 참조하라. |
기본적인 객체의 위치는 일반적으로 모든 데이타베이스에 대하여 공통적인 tablespace인 SYSTEM tablespace에 위치한다. 그러나 SYSTEM은 거의 대부분 원하는 위치가 아니나다. Table은 빨리 커지며 레코드가 추가되고 삭제된다. 때문에 조각들이 생기며 이것이 SYSTEM tablespace 내에 생기게 되면 심각하게 수행능력을 떨어뜨리게 된다.
Object size는 보통 시스템의 예상되는 크기와 용도에 따라 다르다. Installer에 의해 설정되는 기본적인 크기는 테스트용으로 적당한 크기이다.
Schema 의 소유주는 다른것을 선택할 이유가 없으면 그냥 기본 설정을 받아 들이면된다.
Oracle 회사는 Installer에 의해 생성된 database는 테스트 목적으로만 사용할 것을 권장한다. 기본적으로 제공되는 데이타베이스는 아주 단순하고, OFA를 따르는 데이타베이스이지만, 작고 특정한 환경이나 사용하기에는 적절하지 않다. 생성하는 동안에 tablespace를 위해 다른 장소나 크기를 명시할 수 있다. 그러나 기본적인 5가지 tablespace를 (SYSTEM, ROLLBACK, TEMP, TOOLS 그리고 USERS) 제외하고는 어떠한 것도 생성할 수 없다.
Installer는 설치과정을 자동화 하기 위해서 두가지 기본 방법을 제공한다:
Default installation은 초기 Installer가 하는 질문에 대해 자동적으로 기본값을 선택함으로써 Installer의 질문을 최소화 한다. Silent mode는 최초 Installer 기동동안에 행한 질문에 대한 답변을 저장해 두었다가 현재 설치시 기본적인 답변으로 사용한다. 유사한 설치과정을 많이 반복할 경우 유용하다.
Default installation 시에 ORACLE_BASE, ORACLE_HOME 그리고 ORACLE_SID의 경로를 묻는다. 적절한 정보를 제공하면 Installer는 Software Asset Manager screen을 보여준다. 그기서 설치할 제품을 선택하도록 한다.
Table A-1 기본설치동안에는 보이지 않는 질문들과 Installer가 사용하는 값들을 보여준다.
Installer를 시작하기 전에 DEF_INSTALL 환경변수를 TRUE 또는 FALSE를 설정함으로서 default 또는 custom installation 중 하나를 선택할 수 있다.
반복 설치시 Silent mode로 할 경우, 최초 설치동안에 response file를 생성하여, 후에 설치시에 질문에 대한 답변을 제공할 수 있다.
Silent mode에서 Installer를 사용하기 위해서 다음 과정을 수행하라:
$ ./orainst /rspdest filename여기서 filename은 여러분들의 답변을 기록할 response file에 대한 완전한 절대 경로명을 적어줘야 한다. oracle 계정에게 쓰기가 허용되어 있는지 확인하라.
여기서:
|
filename |
은 여러분들이 최초 설치시에 생성한 response file의 완전한 경로명이다. |
|
products |
빈칸 없이 Comma (,)로 분리한 설치할 제품들의 목록이다. 이용가능한 제품과 명령행에 적을 수 있는 제품의 이름은 Oracle 배포본에 들어 있는 |
Installer를 silent mode에서 실행하는가에 상관없이 README 파일을 읽지 않고 건너뛰게 할 수 있다. Installer를 실행하기 전에 NO_READ라는 환경 변수를 TRUE로 설정하여 README 파일을 읽지 않고 건너 뛸 수 있다.
Installer를 실행하고, 다음 설치시에 이용할 response file을 생성하기 위하여 다음 예와같이 명령어를 주어라. 설치할 수 있는 제품은 Oracle8 서버(Oracle8 Server), 서버 관리자(Server Manager) 그리고 오라클 네임 서버(Oracle Name Server) 이다.
$ ./orainst /rspdest resp_805.rsp
$ ./orainst /rspsrc resp_805.rsp /install rdbms,svrmgrl,NAMES /silent
Table A-2에 오라클의 배포 형식에 따른 배포판 번호와 용어에 대한 기술이 되어 있다.
새로운 배포판과 유지 갱신판은 완전한 소프트웨어형태로 배포되었으며, 기존의 오라클 서버와는 분리된 ORACLE_HOME 디렉토리에 설치된다. 패치는 완전한 소프트웨어 배포판이 아니다. 그리고 항상 기존의 설치된 배포판의 최상위 디렉토리에서 설치되어져야 한다.
Patch 세트는 일반적으로 설치된 기본위에 제품의 잘못을 고치고 완전히 테스트된 후에 전달되는 오라클 회사의 일반적인 제공방식이다. Patch set는 bug fix용으로만 제공된다; 새로운 기능 등을 추가하지는 않는다. 그리고 타겟 시스템의 재설정등이 필요하지 않다.
Patch sets는 세트에서 bug fix와 관련된 라이브러리만을 포함한다. Patch set내에 있는 모든 fix된 것들은 모두 검사되고 점검된다. 이런 patch들은 RDBMS와 PL/SQL에 비교적 덜 충격적인 것들만 포함되기 때문에 서버의 응용 프로그램이나 툴들을 대 설정할 필요는 없다.
Patch sets는 집적식이며, 모든 플랫폼에 대하여 동일한 generic fix들을 포함한다. 예를 들면, Patch set 7.3.3.2는 Patch set 7.3.3.1을 포함한다. Hewlett-Packard addresses에 대한 Patch set 7.3.3.2는 Digital UNIX에 대한 patch set 7.3.3.2와 동일하다. 그러나 그들 세트는 각각의 플랫폼에 따른 소수의 특정한 패치를 포함하고 있다는 것을 명심해야 한다.
Patch sets는 Installer (orainst)를 포함하지 않는다. 만약 patch set 7.3.3.2를 설치하려면 기본 배포본 7.3.3의 Installer를 사용해야 한다.
어떠한 유지보수 작업을 하더라도, 오라클 회사는 먼저 오라클 소프트웨어들을 백업 해 둘 것을 권장하고 있다.
$ORACLE_HOME/orainst directory 아래에 설치되어 있을 것이다. 그렇지 않다면 기초 배포본의 CD-ROM내에 있다.
root.sh script를 실행하도록 질문할 것이다. Patch set을 설치한 후에는 root.sh script를 실행할 필요 없다.
There is no mechanism provided for de-installing a patch set. If you are concerned about being able to de-install a patch set, Oracle Corporation recommends that you back up your software installation, before applying the patch set.
If you must remove a patch set, Oracle Corporation recommends one of the following procedures (in order of preference):
Regardless of how you remove a patch set, please contact Oracle Worldwide Support to verify the problem you are encountering is addressed in the next patch set.
Effective with release 8.0.3, most Oracle products use shared libraries. Shared libraries reduce the space required for products; they also significantly reduce the number of circumstances that require relinking. Instead of relinking, some situations require you to rebuild the client shared library, libclntsh.so.
Rebuilding the client shared library is required in the following situations:
The Installer relinks products and rebuilds the client shared library as necessary.
The following situations still require relinking:
dba)
Use the following procedure to relink products:
When you de-install a product, the Installer removes only the files for the product. It does not remove database objects, directories, or libraries shared by other products. If a library is required only by a product you are removing, the Installer removes the library.
A staging area is a local copy of your Oracle distribution from which you can perform one or more installations. When you create a staging area, you can install and load software in distinct phases. When you install directly from the CD-ROM, you load and install the Oracle distribution in one session.
You should install directly from the CD-ROM if you are performing only one installation, or if you have insufficient disk space to support a staging area in addition to an installed Oracle8 system. Creating and installing from a permanent staging area requires approximately twice the disk space of installing from the CD-ROM.
After you have created a staging area, you cannot add new files to it. For example, you cannot add the files for a software patch to an existing staging area, then install from the area.
Installation problems typically fall into one of the following categories:
If the session terminates because the Installer runs out of space during installation, check the ORACLE_HOME directory for any files installed prior to the crash. Remove the files for products you were installing.
After you have cleaned up ORACLE_HOME, you can use the df command to determine how much space is available. Options for resolving the problem include freeing up existing disk space, adding disk space, or installing a subset of the products you had planned to install.
When the Installer calculates space for transferring files into ORACLE_HOME, it accounts for product dependencies. If it detects there is insufficient space, the Installer issues a warning.
Files are uncompressed when they are transferred to ORACLE_HOME.
If you have created symbolic links in ORACLE_HOME to accommodate parts of the Oracle distribution, the Installer does not follow these links when it calculates space requirements.
If you are sure symbolic links are set up correctly and there is enough space in ORACLE_HOME to install the distribution, you can ignore the Installer warnings regarding insufficient space. Make sure the oracle account has read and write permissions on the linked directories.
The swap space available should be two to four times the physical RAM. If the UNIX system uses swap space for relinking, you probably need to increase the size of the swap space. If you run out of swap space during the relinking of product executables, the Installer returns an error message and aborts the session. You do not need to re-install in this case, but you must enlarge the swap space and relink.
The following error messages can occur during relinking:
Many relinking errors are caused by undefined symbols. Symbols may be undefined when Oracle Net8 protocol adapters are installed without the correct underlying network protocol.
For instance, putmesg and getmesg undefined symbols occur if you install the Oracle SPX/IPX Protocol Adapter, but do not have SPX/IPX installed.
Most of these errors can be corrected by de-installing and re-installing the Oracle system, without the protocol adapter for which you do not have the network software.
The following issues can arise when installing from a staging area.
Do not attempt to add files to an existing staging area. If you want to add a product to an existing staging area, or if it is necessary to recreate a staging area, you must delete all existing files before using the Installer to create the new one.
Following is a list of common pitfalls and indications:
If the Installer returns a message that it is unable to create a file, you are probably trying to install to a location where the oracle account does not have write permission. Use a shell window to change the permissions of the desired directory and retry the operation, or restart the Installer session and specify a different location where the oracle account has write permission.
If the Installer is unable to find a file, check to make sure that you specified the correct location for the CD-ROM, staging area, or link directory from which you are installing. In particular, make sure you did not specify the ORACLE_HOME directory (that is, your destination directory) as the installation source directory.
If the installation source is correctly specified and you are installing from a link directory or staging area, try recreating the installation source.
Messages like the following can occur in a networked environment, when you are logging into a remote machine to run the Installer:
Xlib: connection to "unixdoc8:0.0" refused by server
Xlib: Client is not authorized to connect to Server
In a terminal window logged into your local machine, authorize the connection:
$ xhost + machine_with_Installer
Try restarting the Installer on the remote machine. If authorization problems persist, another possible workaround is to run the Installer in character mode, rather than Motif.
If the Installer returns a message that it is unable to create the database, make sure there is not an Oracle instance running with a sid matching the sid (instance name) you specified during the Installation:
ps aux | grep _sid
or

ps ef | grep _sid
Check the $ORACLE_HOME/orainst/sql.log file for other possible problems.
If you have problems with the display, navigation buttons, or commands, check that the ORACLE_TERM environment variable is set correctly. A full table of ORACLE_TERM settings is available in Chapter 2, "Setting the Environment".
Verify that $USER is the same as the userID of the current user (the oracle account). The following two commands should return the same user:
$ echo $USER
$ id
